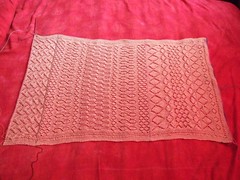
We learn knitting at our mother’s knee and often have patterns passed down to us too. This legacy from our grandmother’s era and before can present a challenge. Yet there is something compelling about reinventing these vintage designs for use today and in continuing to have access to the huge resource that they represent. As well as personal archives you can find vintage patterns in second-hand bookshops and online booksellers. I bought the books in this photograph from Amazon market place sellers after reading a discussion on
Ravelry. There is also a public archive at the
V & A 
The easiest patterns to reuse are those for gloves, socks, household items, children and toddlers. Old abbreviations may be confusing but good patterns will have a key where the antiquated terms are explained. Gloves and socks are often written to be knitted flat and seamed; you might want to transfer these instructions to knitting in the round on double pointed or circular needles.
Patterns for adults are a little more difficult. My first problem in choosing a pattern to update is in finding one that will fit. Our mothers and grandmothers were smaller than we are especially during the war and post war eras of food rationing. Vintage patterns are not usually provided in multiple sizes. Some patterns, often described as suitable for the more matronly figure, do go up to slightly larger sizes. I chose a design from page 65 of ‘Practical Knitting Illustrated’, by Margaret Murray and Jane Koster published by Ohams Press Ltd., 1940.

Firstly it is already in a larger size, 38” to 40”. I need at add roughly 10% to the chest size. It is knitted in a rib which will be a flexible stitch and forgiving of a little over and under sizing. The original is knitted in 3 ply with a tension of 32 stitches to 4” so I can substitute a 4ply yarn to get a larger size. Another way to make it bigger would be to use larger needles. A rib pattern is also easier to add additional stitches to than lace would be.
The length of sleeves and the body are straight forward to lengthen or shorten too as there are sections in both where there is no shaping to take account of.
Whichever pattern you chose a few basics will need to be considered.
Most importantly knit a tension square. If you are replicating a size given in the pattern then you are checking to see if your substituted yarn will knit to the same tension. As well as the stitch count you should look at the drape and feel of the tension square. As I want to knit a size bigger than the pattern, I want my tension to have 10% fewer stitches per inch. If you wanted a bigger size difference you could also add stitches in multiples of 4 for the k2, p2 rib. By checking your tension with the substituted yarn on your chosen needle size you can work out how wide the back will be. Multiply the number of inches you want the back to be by the number of stitches per inch from your tension square and this will give you the number of stitches to cast on.

Don’t forget to add multiples of 2 to each of the front pieces as well. Or you could try a larger needle size to add more width to the same number of stitches, again you would need to do a tension square to check your adaptation.
Reading further on in the pattern there are a series of increases as we proceed up the back, we need to remember that changing the yarn will also have an impact on the number of rows per inch as well as the stitches per inch. Some patterns only give increases on numbered rows rather than giving the measurement but this one does tell us how long the piece should be by the time we are ready to start the armhole shaping so we can check that the garment isn’t coming out too long, if it is rework putting the shaping closer together.

Again check the shaping on the armhole edge as the increases may need to be worked closer together to account for the additional length caused by substituting the yarns. Remember to write down the adaptations you make so that you can replicate them for the other pieces of your project.

Other possible adaptations: working the cardigan in the round; adding the button bands by picking up the stitches with a circular needle and knitting them onto the fronts rather than knitting them separately and sewing them on afterwards.
Knowing which modern yarns will knit to the same tension as in the pattern and how to change to modern needles will allow you access to all those children’s clothes, babies outfits and accessories. If you want to try the fitted designs but don’t want to have the work of adapting the patterns to a modern figure there are people who have done that work for you and lots of beautiful patterns already converted. A quick search for
‘vintage knitting ‘ on Amazon.co.uk will show you a few.


 Again check the shaping on the armhole edge as the increases may need to be worked closer together to account for the additional length caused by substituting the yarns. Remember to write down the adaptations you make so that you can replicate them for the other pieces of your project.
